🎧 Build, Learn, and Tune In – Own the Airwaves Today!
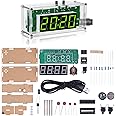
The Elenco AM/FM Radio Kit is a hands-on educational project featuring a superheterodyne tuner capable of receiving standard AM and FM broadcasts up to 108 MHz. Designed for STEM learners, it includes a 56-page instructional manual and a unique PCB layout for intuitive soldering assembly. Powered by a 9V battery with built-in AM antenna and 3.5mm audio output, this kit offers a practical, immersive electronics experience perfect for high school and university students.


| Style | Raw |
| Color | Blue |
| Item Weight | 12 Ounces |
| Item Dimensions L x W x H | 18"L x 12"W x 12"H |
| Hardware Interface | 3.5mm Audio |
| Frequency | 108 MHz |
| Compatible Devices | AM/FM Radio Receivers |
| Number of Batteries | 1 9V batteries required. |
| Voltage | 9 Volts |
| Display Type | LCD |
| Power Source | Battery Powered |
| Radio Bands Supported | 2-Band |
| Water Resistance Level | Not Water Resistant |
| Special Features | Built-In AM Antenna |
| Connectivity Technology | NFC |
| Tuner Type | Superheterodyne, AM, FM |
O**E
Great Fun And A Great Teaching Tool
With this review I hope give you some idea about what this kit does and doesn't do and how it can be a great learning tool for both young and old alike.This kit is very complete, everything needed for building a complete AM and FM radio is included in the box. All the parts are neatly laid out and placed on cards for easy identification. The construction manual is very easy to follow and it also includes tests needed to be done during the construction process as well as final tuning when complete.The radio's circuit board is laid out is with the AM section on the bottom and the FM on the top of the board. If you follow the manual you will be building the AM section first with the FM section second. This makes the construction easier as both the AM and FM sections of the radio are broken down into small sections, then a test to make sure everything is working before moving to the next section. The manual goes into how and why the circuits and other electronic parts do what they do and how they do it. This kit can be built with just a multi-meter or you can also use an oscilloscope for more complete testing and understanding of the parts and circuits, but the oscilloscope is not necessary for the build.This is kit is both a relaxing build and a great teaching tool. If you have teenagers in the house, this kit will teach how to make good solder connections of the parts onto the board. The board has more room between parts and solder pads, so the process is much easier to get the parts mounted to the board successfully. The board also has all the symbols printed on the board that you would normally see on a schematic drawing layout. This is a good way to see both symbols together and it helps in the learning process. The board also includes dedicated test points for doing the testing needed during the building process.This is one of the best kits to get your feet wet in electronics or as a very good teaching tool for young adults and adults alike. Once done you have a working AM/FM radio. Since this is a battery operated radio, its great to have around when the power goes out.I would recommend using a good 60/40 Tin Lead solder, with a diameter of 1mm, this solder is much easier to work with and make a good connection, you don't need all that heat on the board and electronic parts when learning. The provided solder is lead free and makes it more of a challenge to get a good solder joint when learning the soldering process.Fun project!
M**S
Great learning tool, great practice tool.
I bought this set because of the promise that there would be a booklet explaining in detail what each of the modules in the circuit do and why they are constructed the way they are. The booklet, while not super detailed (because it's not a textbook) does indeed live up to that promise.As a soldering exercise, it's on the easy side: I think with a bit of practice this can be assembled wearing mittens if need be. But it is sold as a beginners' learning tool, so that's absolutely appropriate.I work at a school where I am on duty in the Engineering Lab once a week, so this has been my time waster. Of course I won't be using it as a radio (all radio stations stream nowadays), but I'm happy with the purchase.
A**R
Good kit, could be a bit better
I bought this because I thought it would be fun to build and refresh some of my basic RF electronics skills. Kit is fairly easy to assemble but not for a total novice. The manual starts you off but then leaves you to assemble the kit without the step-by-step that other kits include. Or perhaps I'm missing some supplemental documentation. Not a big deal if you're careful and have some background in electronics and/or assembling kits like this. Another issue is all of the solder pads on the board are very shiny and smooth and solder doesn't want to stick, even if you use flux. You're going to want to rough up the pads slightly with an emory cloth or other small abrasive tool. The ferrite AM antenna coil needed to be reglued to the core.
J**S
Great electronics project
I built the AM section first. Just followed the instructions for assembly and ignored all the tests. When finished, I had an operating AM radio. A few adjustments later (following instructions for adjusting with no test equipment), I could tune many local stations.I then assembled the FM section by installing all components and ignoring assembly instructions. I installed all resistors, then all capacitors, then coils, diodes, transistors, and transformers. The FM section didn't work. I used a signal generator at 90MHz, no modulation, and a multimeter and traced the problem to transformer T4. Transistor Q6 had no collector voltage indicating an open circuit in T4. I removed T4 from the circuit board and removed the can from the assembly. It took a magnifier and some patience to find a broken, hair thin wire and reconnect it. I replaced the can and soldered T4 back on the circuit board. With power applied, the FM section came to life. After a few adjustments (following instructions for adjusting with no test equipment), I could tune several local stations.Recommendations:1. The radio kit is a fun project and can be a rewarding learning experience but some precautions are necessary. The copper circuitry on the PC board is very thin and easily damaged. A soldered connection can be broken by applying pressure to the component side. If any movement is possible, the soldered connection will be torn away from the rest of the circuitry and may not be visually evident. This happened twice with me.2. I have had many years of electronics experience and felt pretty confident with my skipping so much of the instructions. I do NOT recommend my method. The kit is a learning experience and all instructions should be followed.3. All resistors and small capacitors are provided on cards with the reference numbers and values. The schematic diagram provided on the back of the instruction book shows the reference numbers for all parts, but not their values. Don't throw the cards away or it will be a pain in the neck to determine the correct value for a referenced part.4. Diodes D2 and D3 are type 1N34A. Diode D1 is a Varactor diode and looks like D2 and D3. Keep them separate or suffer the consequences.5. A 60 watt soldering iron is appropriate for all soldering, Use 60/40 Tin/Lead solder and throw the solder supplied in the kit away. It requires too much heat to work properly.
Trustpilot
1 month ago
2 months ago